Sunday, January 24, 2016

Shabby Pink Carousel Horse

I've created another carousel horse layout, this time using Blue Fern Studios chipboard as the centerpiece! This chippie was the reason I desired to create carousel horse layouts in the first place. The other one I made is the Black Peacock Carousel Horse
Both of these layouts are on gorgeous diamond patterned Blue Fern Studios paper.  I bought this particular paper because purple is my favorite color. : )

I wanted the chipboard carousel horse to really be the center focus, so I heat embossed it in Fran-táge Shabby Pink which is full of gold sparkles and gold & white splatters.  I acrylic painted the pole in gold; then heavily applied Christmas Gold glitter glue.  The ribbon on the pole was heat embossed in Lindy's Stamp Gang color Imperial Crown Purple Gold....so it is a true deep purple with a gold shimmer!  To the flourish cut out in the center of the horse, I added purple microbeads topped with Glossy Accents to glue them in place.  Wild Orchid Crafts tiny 2-tone pink roses look perfect on the mane and metallic gold nailheads line the saddle.  I'm very pleased with this beauty!

To really make this chippie the centerpiece, I framed it with Wycinanka intricate and extremely delicate pieces that I edge-inked in Plum Berry color; added dark purple pearls; WOC tiny open roses and some dusty pink colored bling.  

I cut out the whole centerpiece, which is shown below. I distressed and tore the edges for a more shabby look.  I generously shaded the inside edges with Distress Ink Dusty Concord.  To give it dimension, this whole piece was glued to cardboard so it would be lifted off the page and really standout.  Then I fit the piece onto another sheet of the same paper, carefully lining up the diamond pattern.
I added pieces from the Wycinanka set on opposite ends of the center piece. These were edge-inked and then decorated with dark purple pearls and each with an arrangement of flowers & round pearlescent picks.

 
Finally, I randomly edge punched the whole layout and then inked all of the edges.  Pastel Lilac pearls added even more of a feminine touch.
 
Thank you so much for viewing my layout........and, as always, have a wonderful day! Lisa : )

Products used:
Blue Fern Studios DéJà Vu collection - page name: Un Voyage À Paris


Blue Fern Studios chipboard - Carousel Horse


Martha Stewart punch - Beaded Ruffle


Stampendous Fran-táge embossing powder - Shabby Pink


Wild Orchid Crafts:

 Mixed Pink Open Roses 10mm (MKX-661)


Mixed 2-tone Open Roses 10mm (MKX-304)


2-tone Purple/Lilac Lilies (MKX-130)


Mixed Pastel tone Chrysanthemums Set B (QVR-030)


Miniature Mixed Pastel Sweetheart Blossoms (MKX-265)


2-tone Lilac Aster Daisy (GST-224)


Green Long Grass (MKX-443)


Wycinanka (www.wycinanka.net)- Trio collection-Border & Decorative Corners (GST-049)


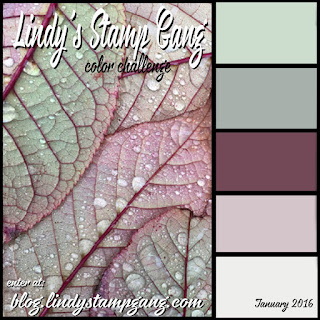
Lindy's Stamp Gang embossing powder - Imperial Crown Purple Gold
Ranger Tim Holtz Distress Ink - Dusty Concord
ColorBox Pigment Ink - Plum Berry
Ranger Glossy Accents
Want2Scrap - Baby Purple Pearls
Michael's & Hobby Lobby craft stores:
plum ribbon, pearlescent berry picks, lilac pearls, purple micro beads, shabby pink rhinestone circles, Christmas-Gold glitter glue, acrylic metallic antique gold paint, gold nailheads


Monday, January 18, 2016

Black Peacock Carousel Horse

Hi everyone!
Today I'm sharing a layout I created with a gorgeous art image of a black carousel horse full of peacock feathers and gold!  I really fell in love with it when I found it on the internet!  The artist is Heather Bruton. 

The perfect lime green colored trim was used to adorn the top & bottom of the print.

I heat embossed The Dusty Attic peacock feathers with the absolutely stunning Blue Fern Studios Imagine Ink color "Celestial" - WOW!  It looks like a night sky with millions of stars!  Patina colored Stickles was generously applied to tone down the deep black, but you can still see some areas with no glitter glue and those are sparkly too, with hints of red.  It's truly a "WOW" color! 
To the solid piece of the feather, I acrylic painted in a blue-turquoise color and then added lots of Patina Stickles to glitter it up.

To the 'eye' I acrylic painted with Royal Gold Metallic & then centered a pretty, blue embellishment. 
Here is a close up in the bright sun:
 
The beautiful paper is from the new Blush collection by Blue Fern Studios!  The diamond pattern in a light turquoise color worked great with the art image! Celadon pigment ink was used to add contrast around the chipboard pieces, flower cluster & photo.

I LOVE the Blue Fern Studios Tattered Diamond Bits chipboard pieces!  I heat embossed a base color in Distressed Shabby Shutters; then added glitter glue in Christmas Gold and Patina colors. 
Two photos - one taken in the shade and one in the sun:
 
 
The pretty black lace comes from a shirt my daughter had.  I stitched a 'fan' for the corner piece.

Thanks so much for visiting!  Have a great week!  Lisa : )

Products used:

Blue Fern Studios - Blush collection - page named: Charmed


Blue Fern Studios chipboard - Tattered Diamond Bits


The Dusty Attic chipboard - Peacock Feathers (DA0568)


Wild Orchid Crafts -
    Light Blue Wild Rose 30mm (QVR-012)


    Green Fern Leaves (MKX-187)


     Black Double Head Pearl Stamens (MKX-571)


Martha Stewart punch - Rose Leaf


Ranger Tim Holtz Distress Stickles - Patina


Ranger Tim Holtz Distress EP - Shabby Shutters


Michael's/Hobby Lobby craft stores -
Flowers, Decorative Trim, Fun Fur ("Deep Sea"), large light blue Rhinestone Brad, glitter lime gemstone brad, Christmas Gold glitter glue, acrylic paints - Royal Gold Metallic & Indian Turquoise
WeRMemory Keepers - eyelet 'Pewter Press'
ColorBox Pigment Ink - Celadon

Saturday, January 9, 2016

What a Wonderful Day

Today I'm sharing a 1951 photo of my parents on their wedding day!  Mom looks 'giddy' with happiness. : )
She was 20 years old and Dad was 24.  What a beautiful couple!

I recently received the absolutely stunningly gorgeous Blue Fern Studios Timeless paper collection!  This paper is SO beautiful and made such a stunning background for this wonderful photo!  All I did was a little edge stamping and glittered the butterfly.

Initially I had some trouble entering this in the Lindy's Stamp Gang January 2016 Color Challenge, but it appears it may have taken and is entered.  
Their beautiful board:
http://blog.lindystampgang.com/color-challenge-info/

All of the flowers in my layout are Wild Orchid Crafts roses and all were sprayed or touched up with Lindy's Stamp Gang Starburst Bodacious Blush.  This is one of my very most favorite Starburst colors because it's very vintage! 

The large roses were first sprayed with LSG Starburst Salt Water Taffy and then lightly sprayed with Bodacious Blush.  LOVE!!! I also sprayed the tassels with Bodacious Blush and then accented them with spritzes of LSG Starburst Alpine Ice Rose to get a two-tone effect.  I really love how this flower-tassel cluster came out!


The gorgeous swirled chipboard at the top of the layout is from WOW (Words or Whatever).  I embossed it with LSG color Stardust Candy Rose and then added touches of Bodacious Blush mica powder.  This vintage look made a huge difference in something pretty to something WOW!  This piece was then decorated with silver microbeads and purple toned small roses brushed with Starburst Bodacious Blush.


The Blue Fern Studios chippie, Deja Vu Dangle, is absolutely divine!  It was so perfect for this layout!  I simply painted it with Bodacious Blush mica powder so that the chipboard would soak in the color and be on the darker side.  Stunning!  I added a small rose and Want2Scrap Mother of Pearl rhinestones.  These are very unique and have tints of blue, pink and gold.   In the open oval at the bottom of this chippie, I placed a tiny portrait of my parents taken in 2003 (when they had been married 52 yrs).  


The title was cut from Blue Fern Studios Timeless collection page Calling Cards.  I printed a sentiment as well to commemorate their long marriage together. 
 

This certainly was a wonderful day on March 17, 1951! 
Because of it, I'm here today to create something that I have no doubt both of my parents would love.

Thank you for visiting and have a wonderful day!  Lisa : )

 
Products used:
 
Blue Fern Studios:
  Timeless paper collection-
    ~Papillons
     ~Calling Cards
   chipboard - Deja Vu Dangles
   stamp - Shabby Edges
WOW (Words or Whatever) chipboard - Belle Flourish
Lindy's Stamp Gang:
  Embossing Powder - Stardust Candy Rose
 
   Pink/White Mix, Large Wild Roses 40mm (QVR-071)
   White, Large Wild Rosebuds (MKX-100)
    Purple/Lilac Tone Open Roses 15mm (MKX-662) 
    Pink Mix Open Roses 10mm (MKX-661)
    White Long Stem Stamens (MKX-471)
   Green Rose Leaves 15mm (MKX-441)
 
Creative Charms - Vintage Brad (pink)
 
Jolee's Boutique - Fleur de Lis
 
Petaloo - Chantilly Velvet Leaves
 
Michael's - Bronze Glitter Number stickers, Silver Microbeads, Bling on a roll-clear diamonds
Hobby Lobby - tassels & beaded ribbon 
Want2Scrap rhinestones - Pink & Mother of Pearl
ColorBox Pigment Ink - Chestnut Roan
Distress Stickles - Vintage Photo & Antique Linen